 Home
About
Support
Vote
Documentation
Discord
InviteBot
Home
About
Support
Vote
Documentation
Discord
InviteBot
Home
About
Support
Vote
Documentation
Discord
InviteBot
Home
About
Support
Vote
Documentation
Discord
InviteBot
Info!
The words on red are
optional when you use the command and the words on
blue are required.
Also, on this bot the commands are
SlashCommands, later on this page there will be a tutorial of how to use them
| NAME | COMMAND | DESCRIPTION |
|---|---|---|
| Add | /add [@username] | This command is used to add a user to a channel by giving him permissions. |
| Avatar | /avatar [@username] | This will display you profile as .png. |
| Ban | /ban [@username] | This will ban the user selected from the server. |
| BotStats | /botstat | This will show you some informations about the bot. |
| Command List | /command-list | This will display a list with all the commands of the bot. |
| Emojis | /emojis | This will show all the emojis of the server. |
| Help | /help | This shows some help to use the bot. |
| Invite Bot | /invite-bot | This will give you a link for invite the bot to your server. |
| Kick | /kick [@username] | This will kick the user selected from the server. |
| MemberCount | /membercount | This will display the number of members on the server. |
| Purge | /purge [amount] | This will delete the amount of messages chosen. |
| Remove | /remove [@username] | This command is used to remove a user from a channel by removing his permissions. |
| Roles | /roles | This will show all the roles of the server. |
| ServerInfo | /serverinfo | This will display the information of the server. |
| Ticket Pannel | /ticket-pannel | This will bring up a ticket panel to open tickets. |
| UserInfo | /userinfo [@username] | This will display the iformation of the user selected. |
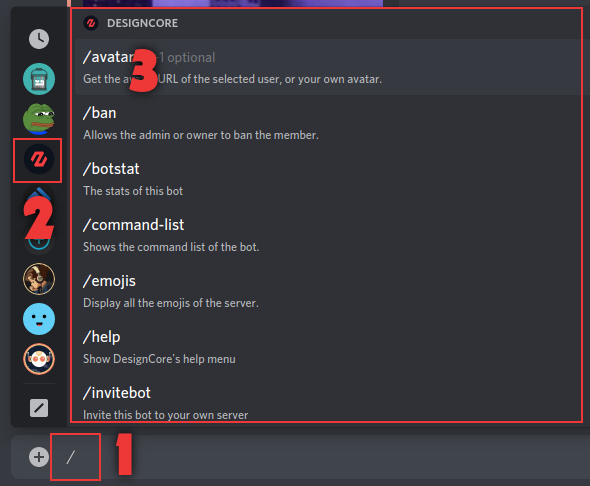
1 ➜ Write a slash "/" on the chat.
2 ➜ Search and select DesignCore on the bot list.
3 ➜ You will find the list of all the commands, don't forgot to scroll down to see all the commands.
1 ➜ Use the /ticket-pannel command to set-up the pannel where you want.
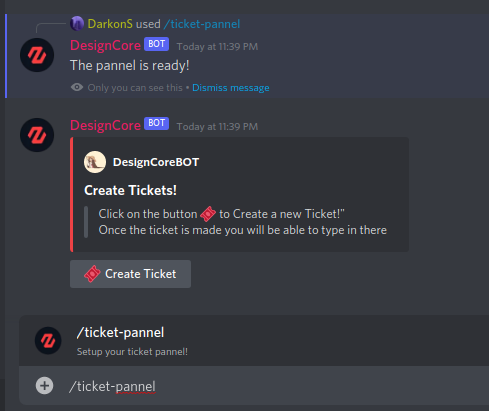
2
➜Cick on
🎟️ Create a ticket to open a ticket.
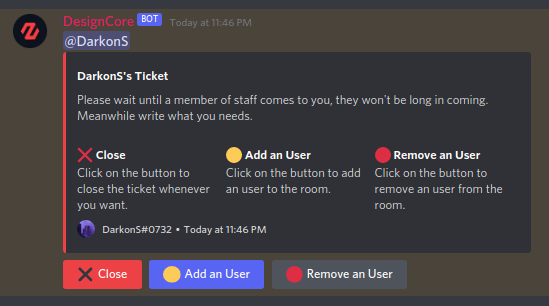
Now you can see three
buttons, Close, Add an User, and Remove an User.
✖️ ➜ Close the ticket.
🟡 ➜ Add an user to the room with /add.
🔴 ➜ Remove an user to the room with /Remove.
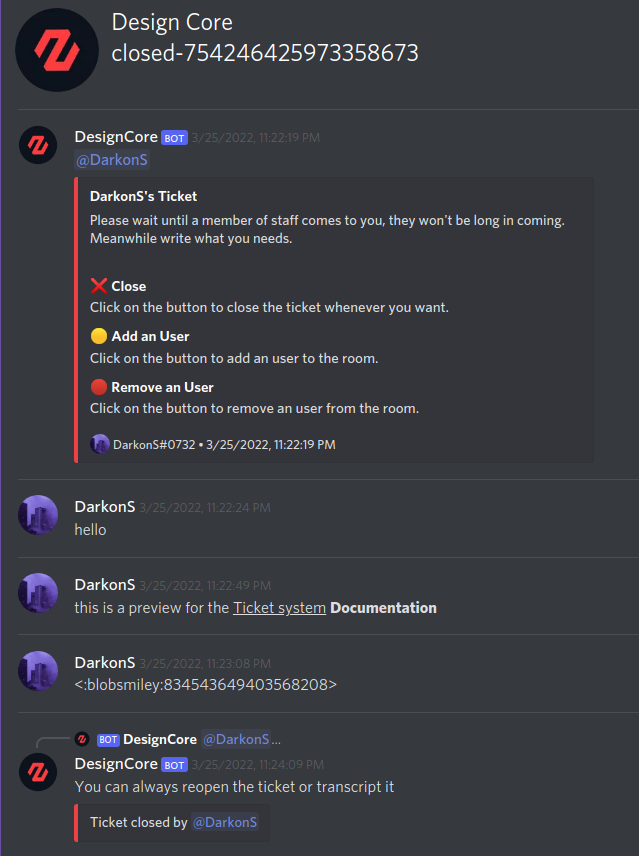
3
➜Cick on ✖️ Close to
close the ticket.
Now you can see three others buttons, Open
Ticket, Transcript, and Delete.
🔓 ➜ Re-open the ticket.
📑 ➜ Save all the data of the ticket with an html project.
🗑️ ➜ Delete the ticket.